
 English
Views: 194 Author: Site Editor Publish Time: 2025-04-27 Origin: Site


Lighting plays an essential role in photography, videography, and other visual arts. Whether you're a beginner or a seasoned professional, understanding the key concepts of lighting can elevate your work to the next level. One of the most fundamental principles in studio lighting is the "3 lighting rule." But what exactly is it, and how can you apply it effectively? Let’s break it down.
The "3 lighting rule" refers to a basic setup used in photography and videography to ensure a well-lit subject, creating the perfect balance of shadows, highlights, and depth. This method uses three distinct lights to shape the subject and eliminate unflattering shadows.
In essence, the rule involves three key light sources:
Key Light
Fill Light
Back Light
Let’s explore each light’s role and how it contributes to the overall composition.
The key light is the most important light in any setup. It’s your primary light source, positioned at the front of the subject to illuminate it. This light determines the overall exposure of the subject and is typically the strongest. The position and angle of the key light can dramatically change the mood of the shot.
Positioning: It’s usually placed at a 45-degree angle to the left or right of the subject and slightly above eye level. This creates natural shadows and depth.
Intensity: The key light should be bright enough to highlight the subject’s details but not so harsh that it washes out textures or skin tones.
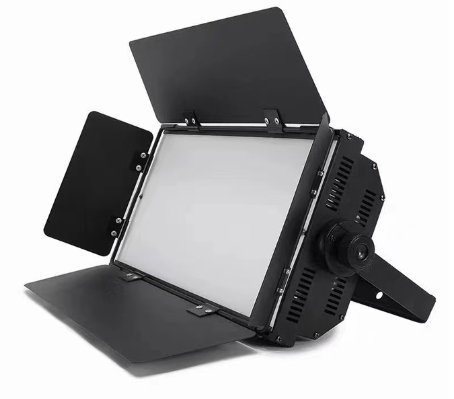
The fill light is used to soften the shadows created by the key light. It’s typically placed on the opposite side of the key light and has a much lower intensity. The goal of the fill light is not to create additional shadows but to ensure that the darker areas of the subject are still visible.
Positioning: The fill light should be placed at a lower angle and opposite the key light. It can be a softer, diffused light source, like a softbox or a bounce board, to avoid harsh contrasts.
Intensity: A fill light’s intensity is typically about half that of the key light. Too much fill can make the shot flat, so it’s important to maintain a balance.
The back light, also known as the rim light or hair light, adds depth to your image by separating the subject from the background. Positioned behind the subject, this light highlights the contours of the subject, adding a dramatic effect. It is especially useful for creating a sense of three-dimensionality and making your subject stand out from the backdrop.
Positioning: The back light should be positioned behind the subject, usually above or to the side. It should point directly at the subject’s outline to create a halo effect or rim light.
Intensity: The back light should be dimmer than the key light but brighter than the fill light. Its purpose is to add contrast and depth without overpowering the key light.
Setting up the 3 lighting rule might seem complicated at first, but with the right equipment and a bit of practice, it becomes second nature. Here's a simple guide to setting up this lighting scheme in your studio.
Start by placing the key light in front of your subject. Ensure that it’s at a 45-degree angle to the left or right, depending on the desired effect. Adjust the height to create shadows that highlight the subject's natural features.
Next, place the fill light opposite the key light. Make sure it’s at a lower intensity to avoid filling in the shadows completely. This will ensure that the natural contrast between light and dark areas remains, preserving depth.
Finally, place the back light behind the subject, ensuring it creates a rim or hair light effect. This helps to define the outline of the subject and adds a visual separation from the background.
Even experienced photographers and videographers can fall into certain traps when using the 3 lighting rule. Here are some common mistakes to be aware of:
Overpowering the Fill Light: If the fill light is too bright, it can flatten your subject and reduce the contrast between light and shadow. Remember, the fill light’s job is only to soften the shadows, not to eliminate them.
Incorrect Key Light Positioning: The position of the key light is critical in shaping the subject. If it’s placed too high or too low, it can create unflattering shadows or fail to highlight the subject’s most important features.
Inconsistent Back Light: The back light should be subtle and used to add depth, not to overpower the subject. If it’s too strong, it can cause the subject to blend into the background.
Q1: Can I use different light sources for each of the three lights?
A1: Absolutely! The key light, fill light, and back light don’t need to be identical. In fact, varying light sources can create unique effects. For instance, you can use a softbox for the key light, a reflector for the fill light, and a small spotlight for the back light. The goal is to maintain the balance of light, shadow, and depth.
Q2: Is the 3 lighting rule necessary for all types of photography?
A2: While the 3 lighting rule is ideal for portrait photography and studio shoots, it’s not always necessary for every type of photography. For example, in product photography or environmental portraits, you may need a different approach. However, understanding the basics of the 3 lighting rule is a great starting point.
Q3: What if I don’t have three light sources?
A3: If you’re working with limited lighting equipment, don’t worry. You can still apply the core concepts of the 3 lighting rule using just two lights. Use the key light and fill light, and rely on the natural background or ambient lighting to create separation.
The 3 lighting rule is a fundamental principle in photography and videography that can help you create balanced, professional-looking shots. By using the key light, fill light, and back light in the right proportions, you can achieve depth, contrast, and a polished look in your work.
Whether you’re shooting portraits, commercials, or product photography, mastering this lighting technique is crucial. With the right setup and a little practice, you’ll be able to harness the power of the 3 lighting rule to elevate your images and videos to new heights.


